
Introduction
Luxury vinyl plank flooring has become one of the most popular flooring options for modern homes, apartments, and commercial spaces. Its realistic wood-like appearance, durability, water resistance, and affordability make it an excellent alternative to hardwood and laminate. However, to truly enjoy its benefits, proper lvp flooring installation is essential. Whether you are a homeowner planning a DIY project or someone who wants to understand the process before hiring professionals, this detailed guide will walk you through everything you need to know.
This article explains the fundamentals, preparation steps, installation process, tools required, common mistakes, maintenance tips, and cost considerations, all in a clear and informative manner. By the end, you will have a solid understanding of how lvp flooring installation works and how to achieve long-lasting, professional-looking results.
Understanding LVP Flooring Before Installation
Luxury vinyl plank flooring is made from multiple layers designed to provide strength, flexibility, and visual appeal. Typically, these layers include a wear layer on top for protection, a decorative layer that mimics natural wood or stone, a rigid or flexible core for stability, and a backing layer that adds balance and comfort. This construction allows LVP to perform well in high-traffic areas, kitchens, bathrooms, and basements.
One of the biggest advantages of LVP is its versatility during installation. Depending on the product, it may feature a click-lock system, glue-down method, or loose-lay design. Each type affects how the floor is installed and how it performs over time. Choosing the right type of plank for your space is the first step toward successful lvp flooring installation.
Why Proper LVP Flooring Installation Matters
Even the highest-quality flooring can fail if it is not installed correctly. Issues such as gaps, buckling, uneven surfaces, and premature wear are often caused by poor installation practices. Proper lvp flooring installation ensures that the planks lock securely, expand and contract naturally, and remain visually appealing for years.
Correct installation also improves comfort underfoot, reduces noise, and enhances the overall value of your home. When done right, LVP flooring can last for decades with minimal maintenance, making the installation process just as important as the flooring itself.
Tools and Materials Needed for Installation
Before starting the installation, it is important to gather all necessary tools and materials. Being prepared helps avoid delays and mistakes during the process. Commonly used tools include a tape measure, utility knife, straight edge, rubber mallet, tapping block, spacers, and a pull bar. A chalk line and carpenter’s square are useful for keeping planks aligned.
In addition to tools, you will need underlayment if it is not pre-attached, moisture barriers for concrete subfloors, and transition strips for doorways. Having everything ready beforehand makes the lvp flooring installation smoother and more efficient.
Preparing the Subfloor for LVP Flooring Installation
Subfloor preparation is one of the most critical steps in the entire process. LVP flooring requires a clean, dry, and level surface to perform properly. Any imperfections in the subfloor can transfer through the planks and affect their stability and appearance.
Start by removing old flooring materials, nails, and debris. Sweep and vacuum thoroughly to eliminate dust. Check for uneven areas using a level; most manufacturers recommend no more than a 3/16-inch variation over a 10-foot span. If necessary, use a floor leveling compound to smooth out low spots. For wooden subfloors, ensure all boards are securely fastened and squeaks are eliminated.
Moisture testing is also essential, especially for concrete subfloors. Excess moisture can damage the planks over time. Installing a moisture barrier where required is a key part of professional lvp flooring installation.
Acclimating LVP Planks Before Installation
Acclimation allows the flooring to adjust to the temperature and humidity of the room where it will be installed. Skipping this step can result in expansion or contraction issues later. Most manufacturers recommend placing the unopened boxes of LVP in the installation area for at least 24 to 48 hours.
During this time, maintain normal living conditions in the space. Proper acclimation helps ensure that the planks fit together correctly and perform as intended once the lvp flooring installation is complete.
Planning the Layout for Best Results
A well-planned layout improves both appearance and efficiency. Begin by measuring the room and determining the direction in which the planks will be laid. Typically, planks look best when installed parallel to the longest wall or in the direction of natural light.
Dry-lay a few rows without locking them to see how the planks will fit. This helps you avoid narrow strips at the edges, which can look unattractive and be difficult to install. Planning also ensures that seams are staggered properly, adding strength and visual appeal to the lvp flooring installation.
Step-by-Step LVP Flooring Installation Process
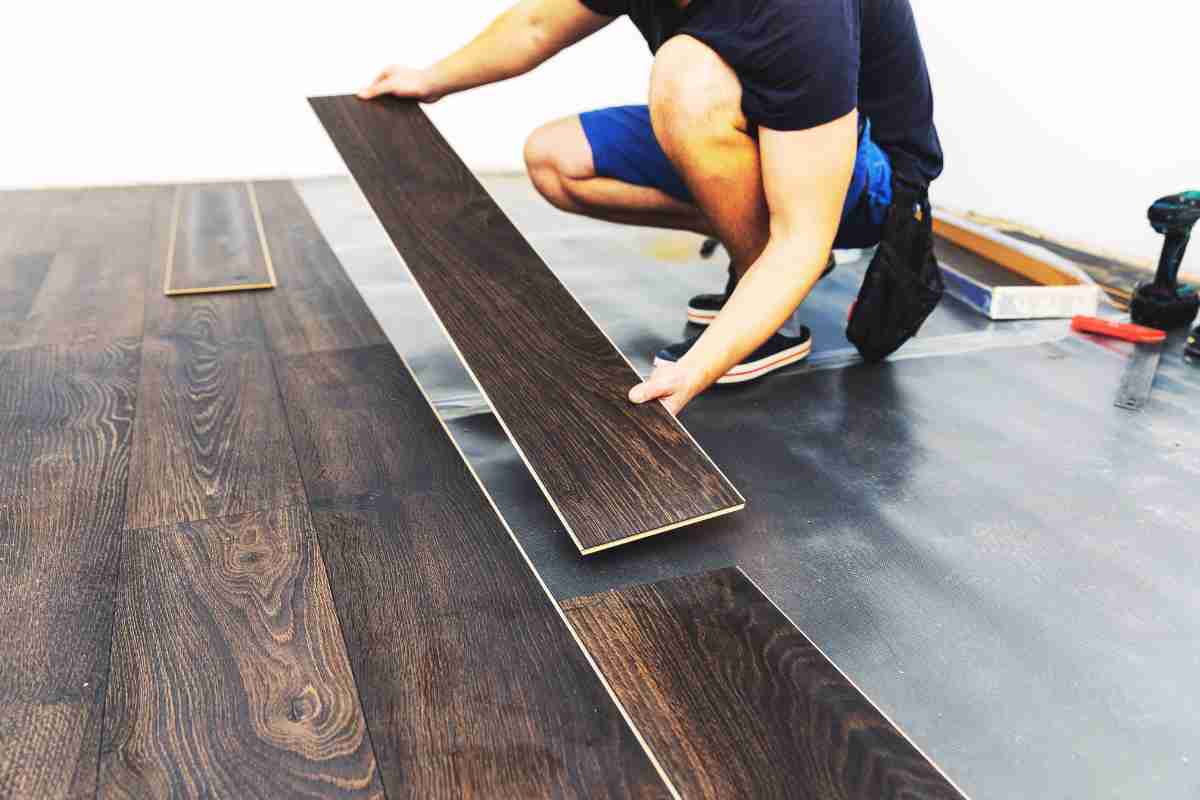
The actual installation process may vary slightly depending on the type of LVP, but the general steps remain similar. Begin by installing spacers along the walls to maintain the required expansion gap, usually around a quarter inch. This gap allows the flooring to expand and contract naturally with temperature changes.
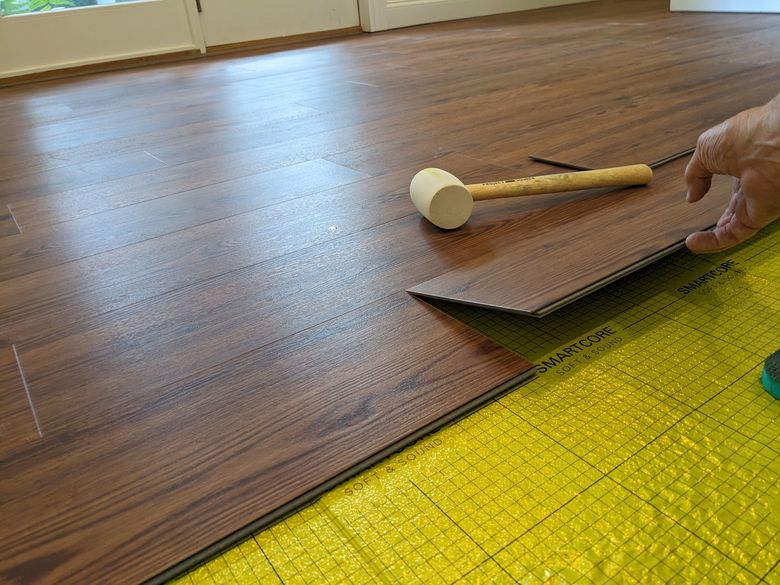
Start laying the first row carefully, ensuring it is straight and properly aligned. Lock the planks together according to the manufacturer’s instructions, using a tapping block and rubber mallet if needed. Continue installing subsequent rows, staggering the joints by at least six inches for stability.
As you progress, periodically check alignment and spacing. Cut planks as necessary to fit around corners, door frames, and obstacles. Patience and attention to detail are essential during this stage of lvp flooring installation, as mistakes can compound quickly.
/easy-install-plank-vinyl-flooring-1822808-schema-ac0d989c95574279806fac99e443fc5e.jpeg)
Handling Doorways, Corners, and Transitions
Doorways and transitions require special care to maintain a clean and professional look. Undercutting door jambs allows the planks to slide underneath for a seamless finish. Transition strips are used where the LVP meets other flooring types, such as tile or carpet.
Corners and irregular spaces may require precise cutting and fitting. Taking your time in these areas ensures that the final result looks polished and cohesive, enhancing the overall success of the lvp flooring installation.
Common Mistakes to Avoid During Installation
One common mistake is failing to prepare the subfloor properly. Even small bumps or debris can cause planks to separate or wear unevenly. Another frequent error is neglecting expansion gaps, which can lead to buckling.
Using excessive force when locking planks together can damage the edges and compromise the locking system. Additionally, ignoring manufacturer guidelines regarding underlayment, moisture barriers, or acclimation can void warranties. Avoiding these mistakes is key to a durable and attractive lvp flooring installation.
Cost Factors Involved in LVP Flooring Installation
The cost of installation depends on several factors, including the type of LVP, room size, subfloor condition, and whether you choose DIY or professional installation. Material costs typically vary based on thickness, wear layer quality, and brand reputation.
Professional installation adds labor costs but often ensures faster and more precise results. DIY installation can save money, but it requires time, patience, and basic skills. Understanding these cost factors helps you plan a realistic budget for your lvp flooring installation.
Maintenance Tips After Installation
Once installed, LVP flooring is relatively easy to maintain. Regular sweeping or vacuuming removes dirt and debris that can cause scratches. Damp mopping with a manufacturer-approved cleaner keeps the surface looking fresh without damaging the wear layer.
Avoid using harsh chemicals, abrasive tools, or excessive water. Place protective pads under furniture legs and use mats in high-traffic areas. Proper maintenance extends the life of your floor and preserves the quality of the lvp flooring installation.
Advantages of Choosing LVP Flooring
LVP flooring offers a combination of beauty and practicality that appeals to many homeowners. It resists moisture, making it suitable for kitchens and bathrooms. Its durability handles heavy foot traffic, pets, and daily wear with ease.
The ease of lvp flooring installation is another major advantage, especially for DIY enthusiasts. With a wide range of styles, colors, and textures available, LVP allows you to achieve a high-end look without the high-end price tag.
When to Hire a Professional Installer
While many homeowners successfully complete installation on their own, there are situations where hiring a professional is the better option. Large or complex spaces, uneven subfloors, and tight deadlines can make professional help worthwhile.
Experienced installers have the tools and expertise to handle challenges efficiently. Choosing professional assistance can provide peace of mind and ensure that your lvp flooring installation meets industry standards.
Conclusion on LVP Flooring Installation
LVP flooring is a smart investment for anyone seeking durability, style, and value. However, its performance and appearance depend heavily on how well it is installed. From preparation and planning to careful execution and maintenance, each step plays a vital role in the final outcome.
By understanding the process and following best practices, you can achieve a floor that enhances your space and lasts for years. Whether you choose a DIY approach or professional help, proper lvp flooring installation ensures that your luxury vinyl plank flooring delivers on its promise of comfort, beauty, and reliability.
Read More:- Standing Seam Metal Roof: A Complete Guide for Homeowners